
JumpCloud Access Requests enables users to submit access requests directly within the JumpCloud platform, thus making it easier to gain access to the tools you need to be more productive. You can now directly request access to applications from the user portal.
Creating a Request
You can create requests for resources or admin access to devices from the Requests section of the User Portal.
- Login to the JumpCloud User Portal.
- Go to Requests.
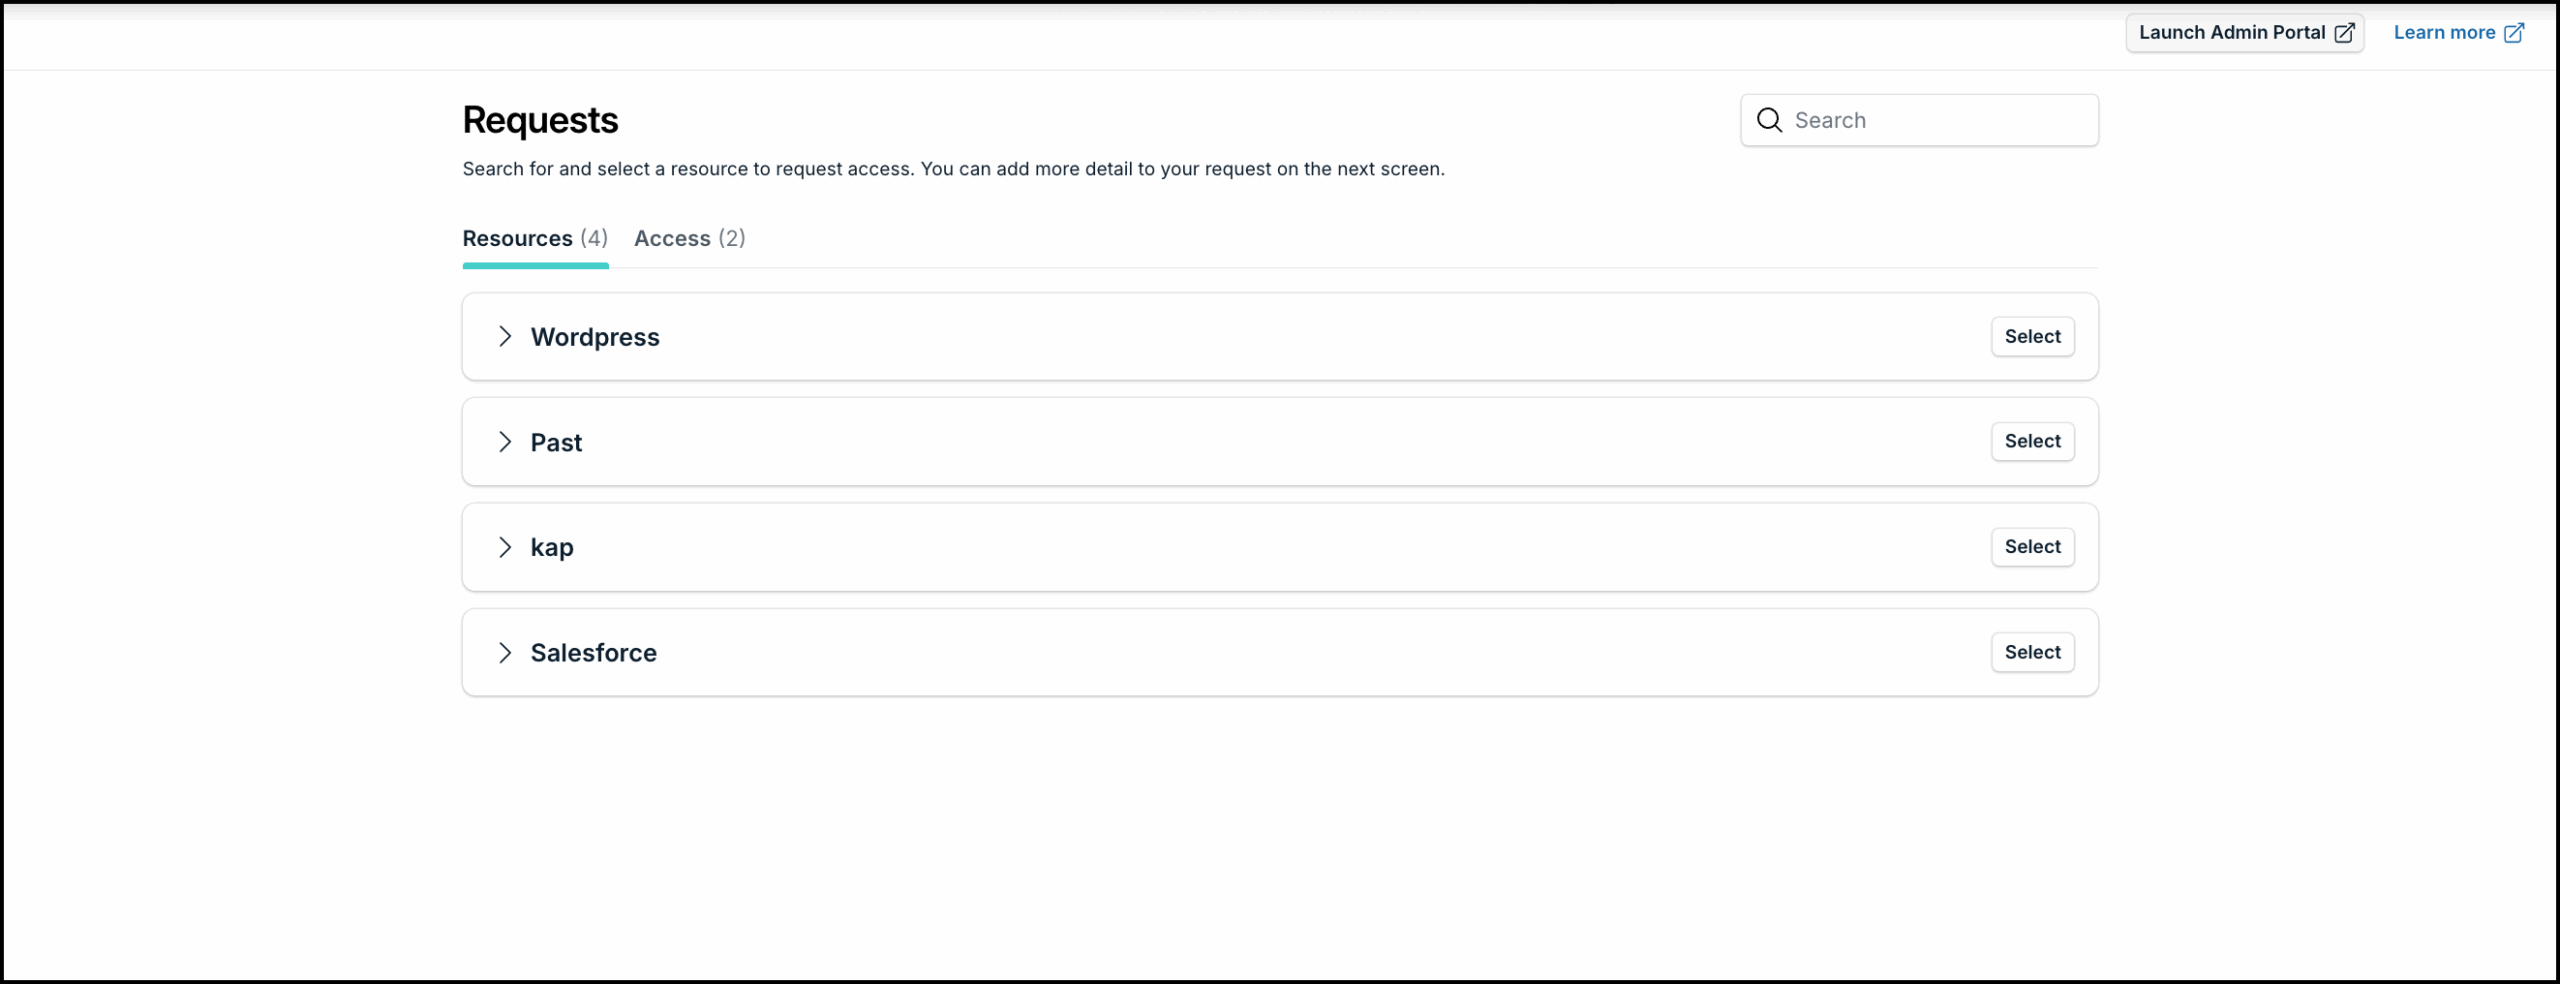
You will see two tabs:- Resources - All resources eligible for you to request access to will be listed here
- Access - All available device admin permissions that you can request for will be listed here.
- Select the appropriate tab.
To create a request for access to a resource:
- Go to the Resources tab.
You can expand each resource to see the details of who needs to approve this request. A request can be approved by either an admin or another user who has been assigned to approve that resource. - Click the Select button next to the resource that you want to request access for.
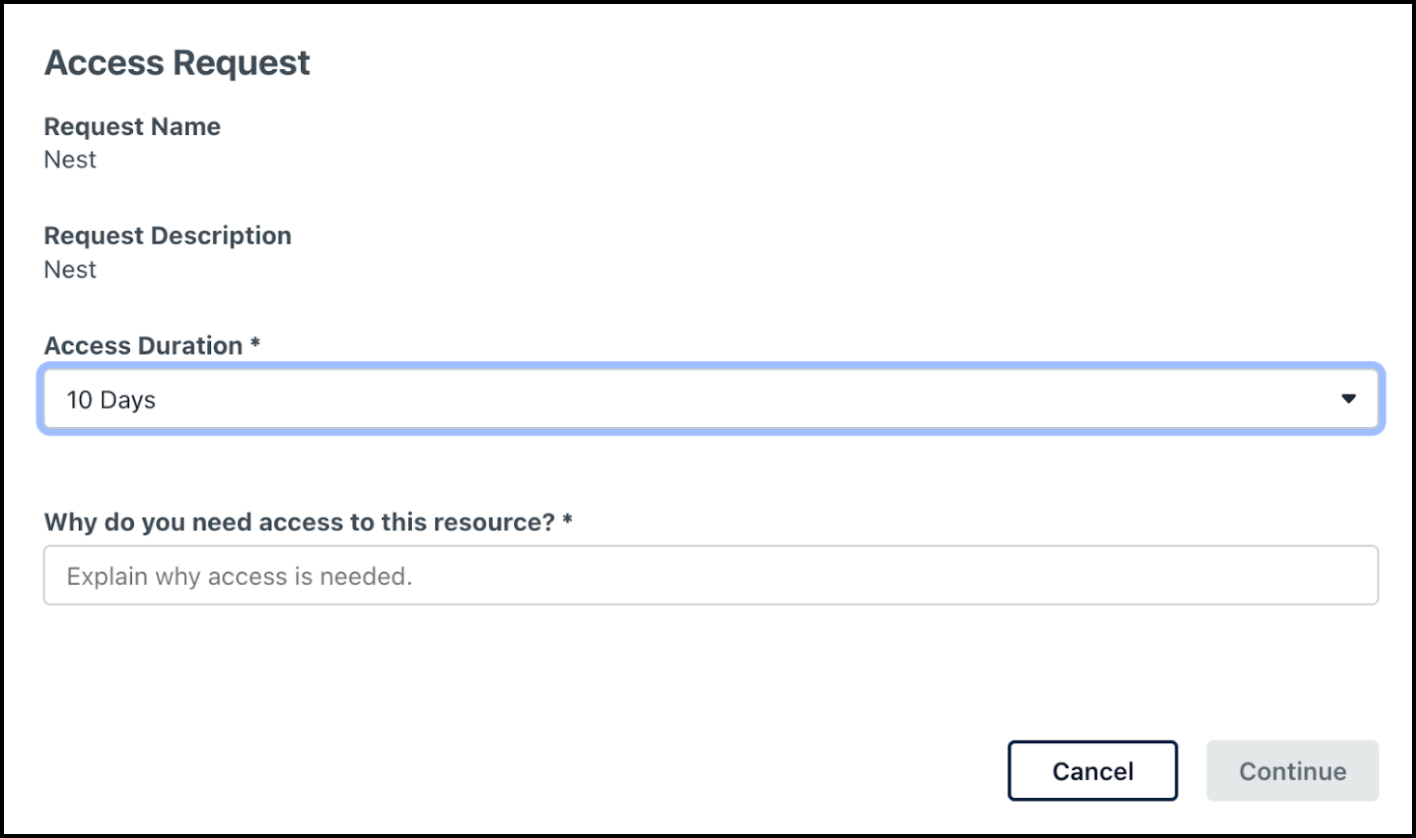
- In the subsequent screen:
Provide a valid reason in the Why do you need access to this resource? field.
![]()
Help the approver understand your requirement by explaining what you intend to do with the resource.
![]()
For certain resources, you might be able to request access for a specific period of time. Depending on how the approval flow is configured by your admin, you will find the option to select the duration for which you want the access from the Access Duration dropdown list. If the duration is fixed, you will only see the duration displayed here instead of the dropdown.
- Click Continue.
The request will be submitted, and you will receive a confirmation email. Expand the resource to view the status of your request in the Approval Progress flow.
![]()
You might not see the Approval Progress flow until your admin enables it.
Once processed, you'll receive another email notifying you of the decision.
- If approved, the resource will be added to the Application section of your user portal.
- If your access is timed, you will see a timer next to your application displaying the duration of your remaining access.
- If denied, you may be asked to provide additional information and resubmit the request.
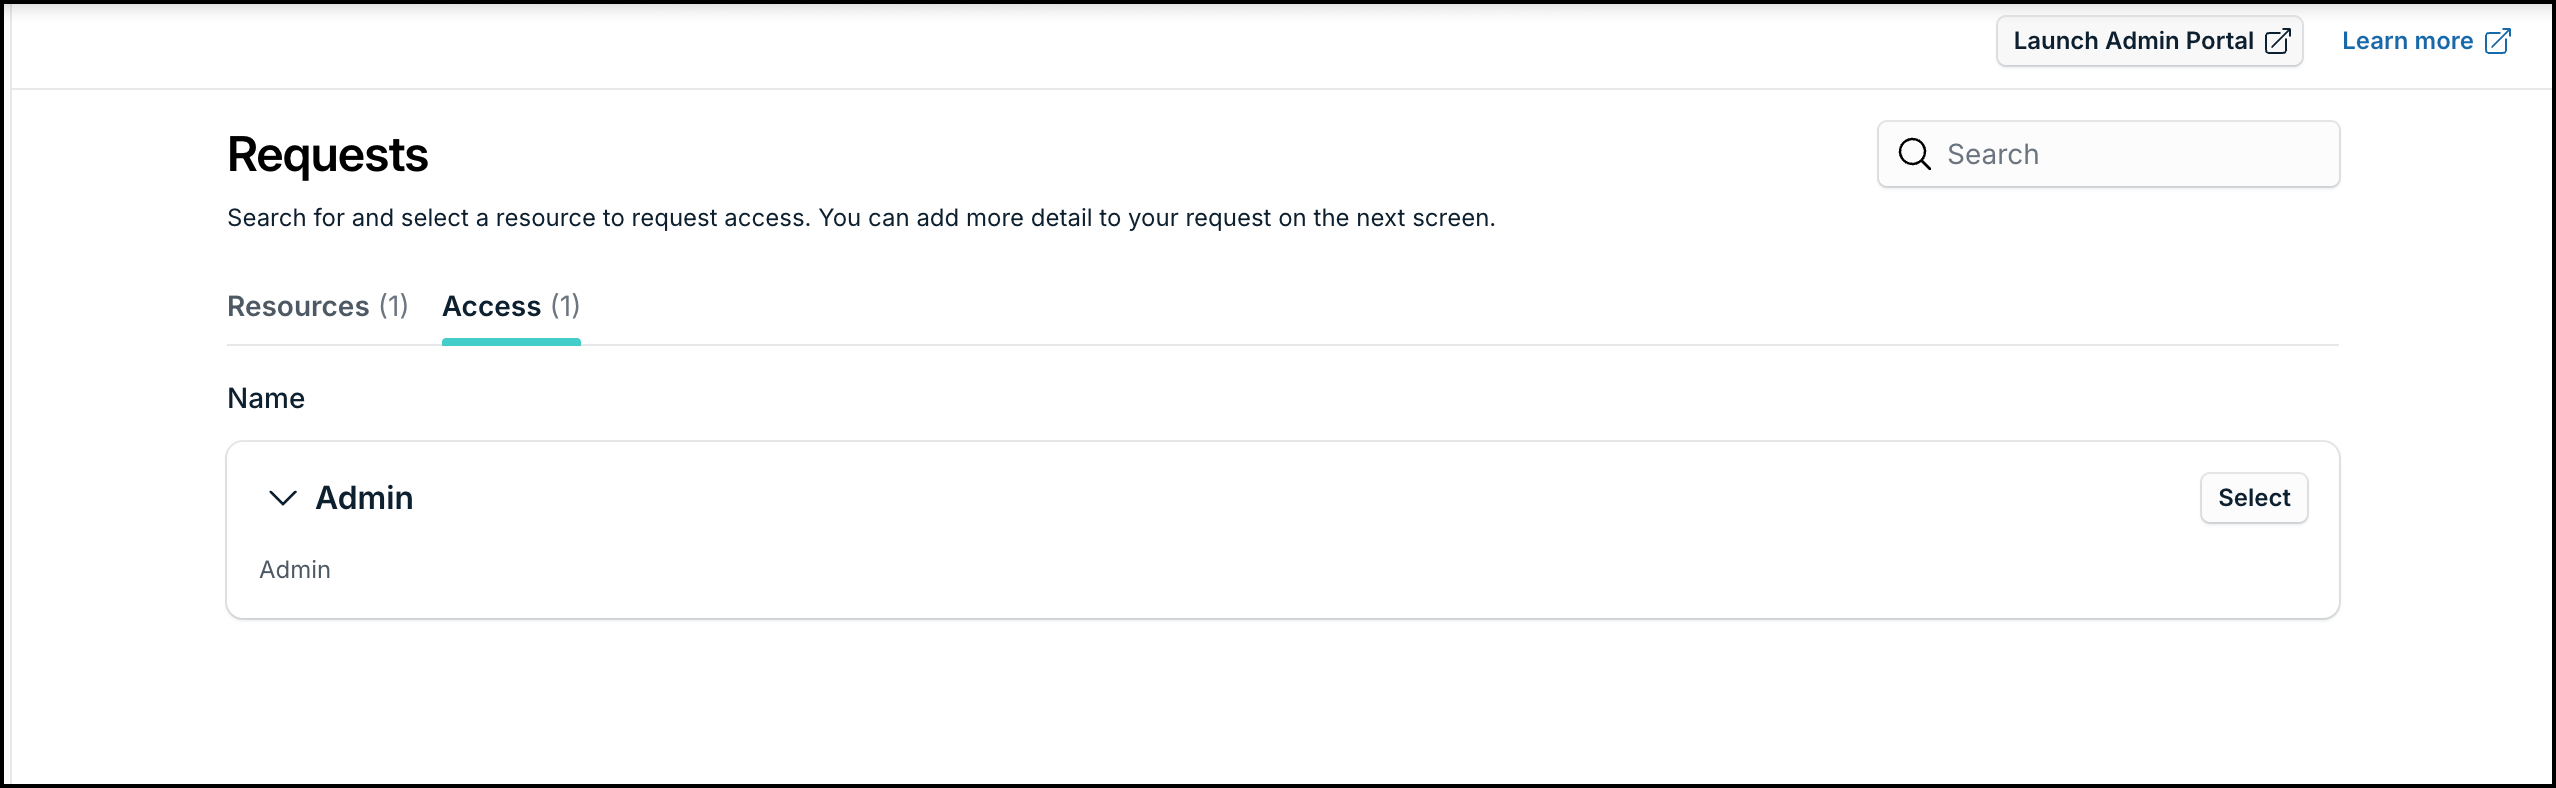
To create a request for admin access to a device:
- Go to the Access tab. You can view all the device admin access options made available to you by your admin.

- Click the Select button next to the device admin access option that you want to use.
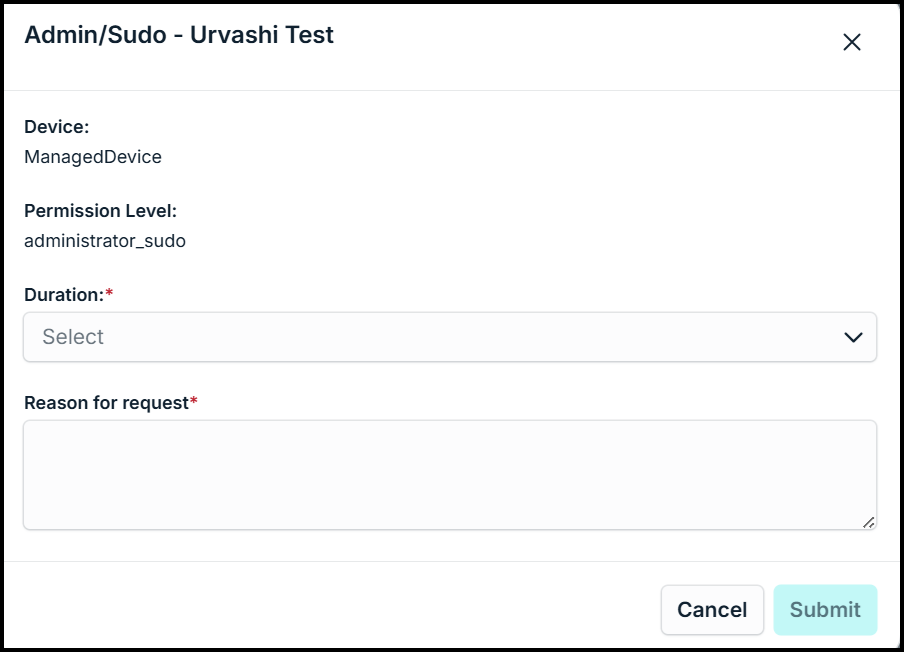
- In the subsequent screen, provide a valid reason in the Reason for Request field.

- Select the duration for which you want admin access to the device.
![]()
Help the approver understand your requirement by explaining what you intend to do with the access.
- Click Continue.
Once you submit the request, the request card will display the status of your request.
- You will receive an email when the request is approved. The request status will be updated to Approved.
- If you do not wish to use the device admin privileges, you can click Cancel Request.
![]()
To begin performing admin tasks on your current device, click Start Session. Your session begins only after you click Start Session.
- The status is updated to Active and the timer displays the remaining time.
- Access is temporary and will automatically expire once the specified duration ends. Once done, you can click End Session to stop using admin privileges before the specified time ends.
Your admin may revoke this access manually at any time before it automatically expires.
Managing Approvals
JumpCloud Access Requests lets admins configure approval flows for end users to submit access requests. Admins can also add assigned approvers to the approval flow who can approve or deny access requests.
If your admin adds you to an approval flow as an assigned approver, you can manage and approve resource requests directly within the JumpCloud platform.
![]()
To approve or deny resource requests in JumpCloud, an admin must add you to an approval flow as an assigned approver.
Managing Approvals in User Portal
To manage requests:
- In the JumpCloud user portal, go to Tasks.
- All the requests that need your attention are listed here. You can expand each request to view the details.
- If the request is timed, you will see the duration for which the request is made.
![]()
Admins can override the requested duration before approving the request.
- Once you’ve verified the request details, you can:
- Click Grant Access to approve the request.
- Click Deny Access to reject the request.
Your action's effect depends on the approval flow's configuration (as defined by the admin):
- Single Approver: If you are the only approver, your action immediately approves or denies the request, and the requester is notified.
- Multiple Approvers: If the flow requires multiple approvers, the request is only approved or denied once all configured conditions are met. The requester is then notified.
![]()
An admin can override a request from the Admin Portal. The user will be notified accordingly.
![]()
If you are an admin assigned as an approver (as a resource owner, requester’s manager, or part of a user group), approve or deny the request in the User Portal to maintain the approval flow progress. Actions taken in the Admin Portal will override the defined approval flow.
Managing Approvals in Slack
Users added as assigned approvers can manage and approve resource requests directly from Slack. Whenever a user submits an access request, if you have been assigned as an approver by your admin, you will receive a notification via direct message.
![]()
Ensure the email that you use to login to Slack must be connected to your JumpCloud user portal. If you haven’t connected your JumpCloud user profile to Slack yet, you will not be able to perform any actions. Jump to Connect JumpCloud to Slack to learn how.
To manage the request:
- Go to your Slack app.
You will receive a direct message when a user submits a request with details such as Request Description, Approver, Requestor, Requester’s Manager and so on.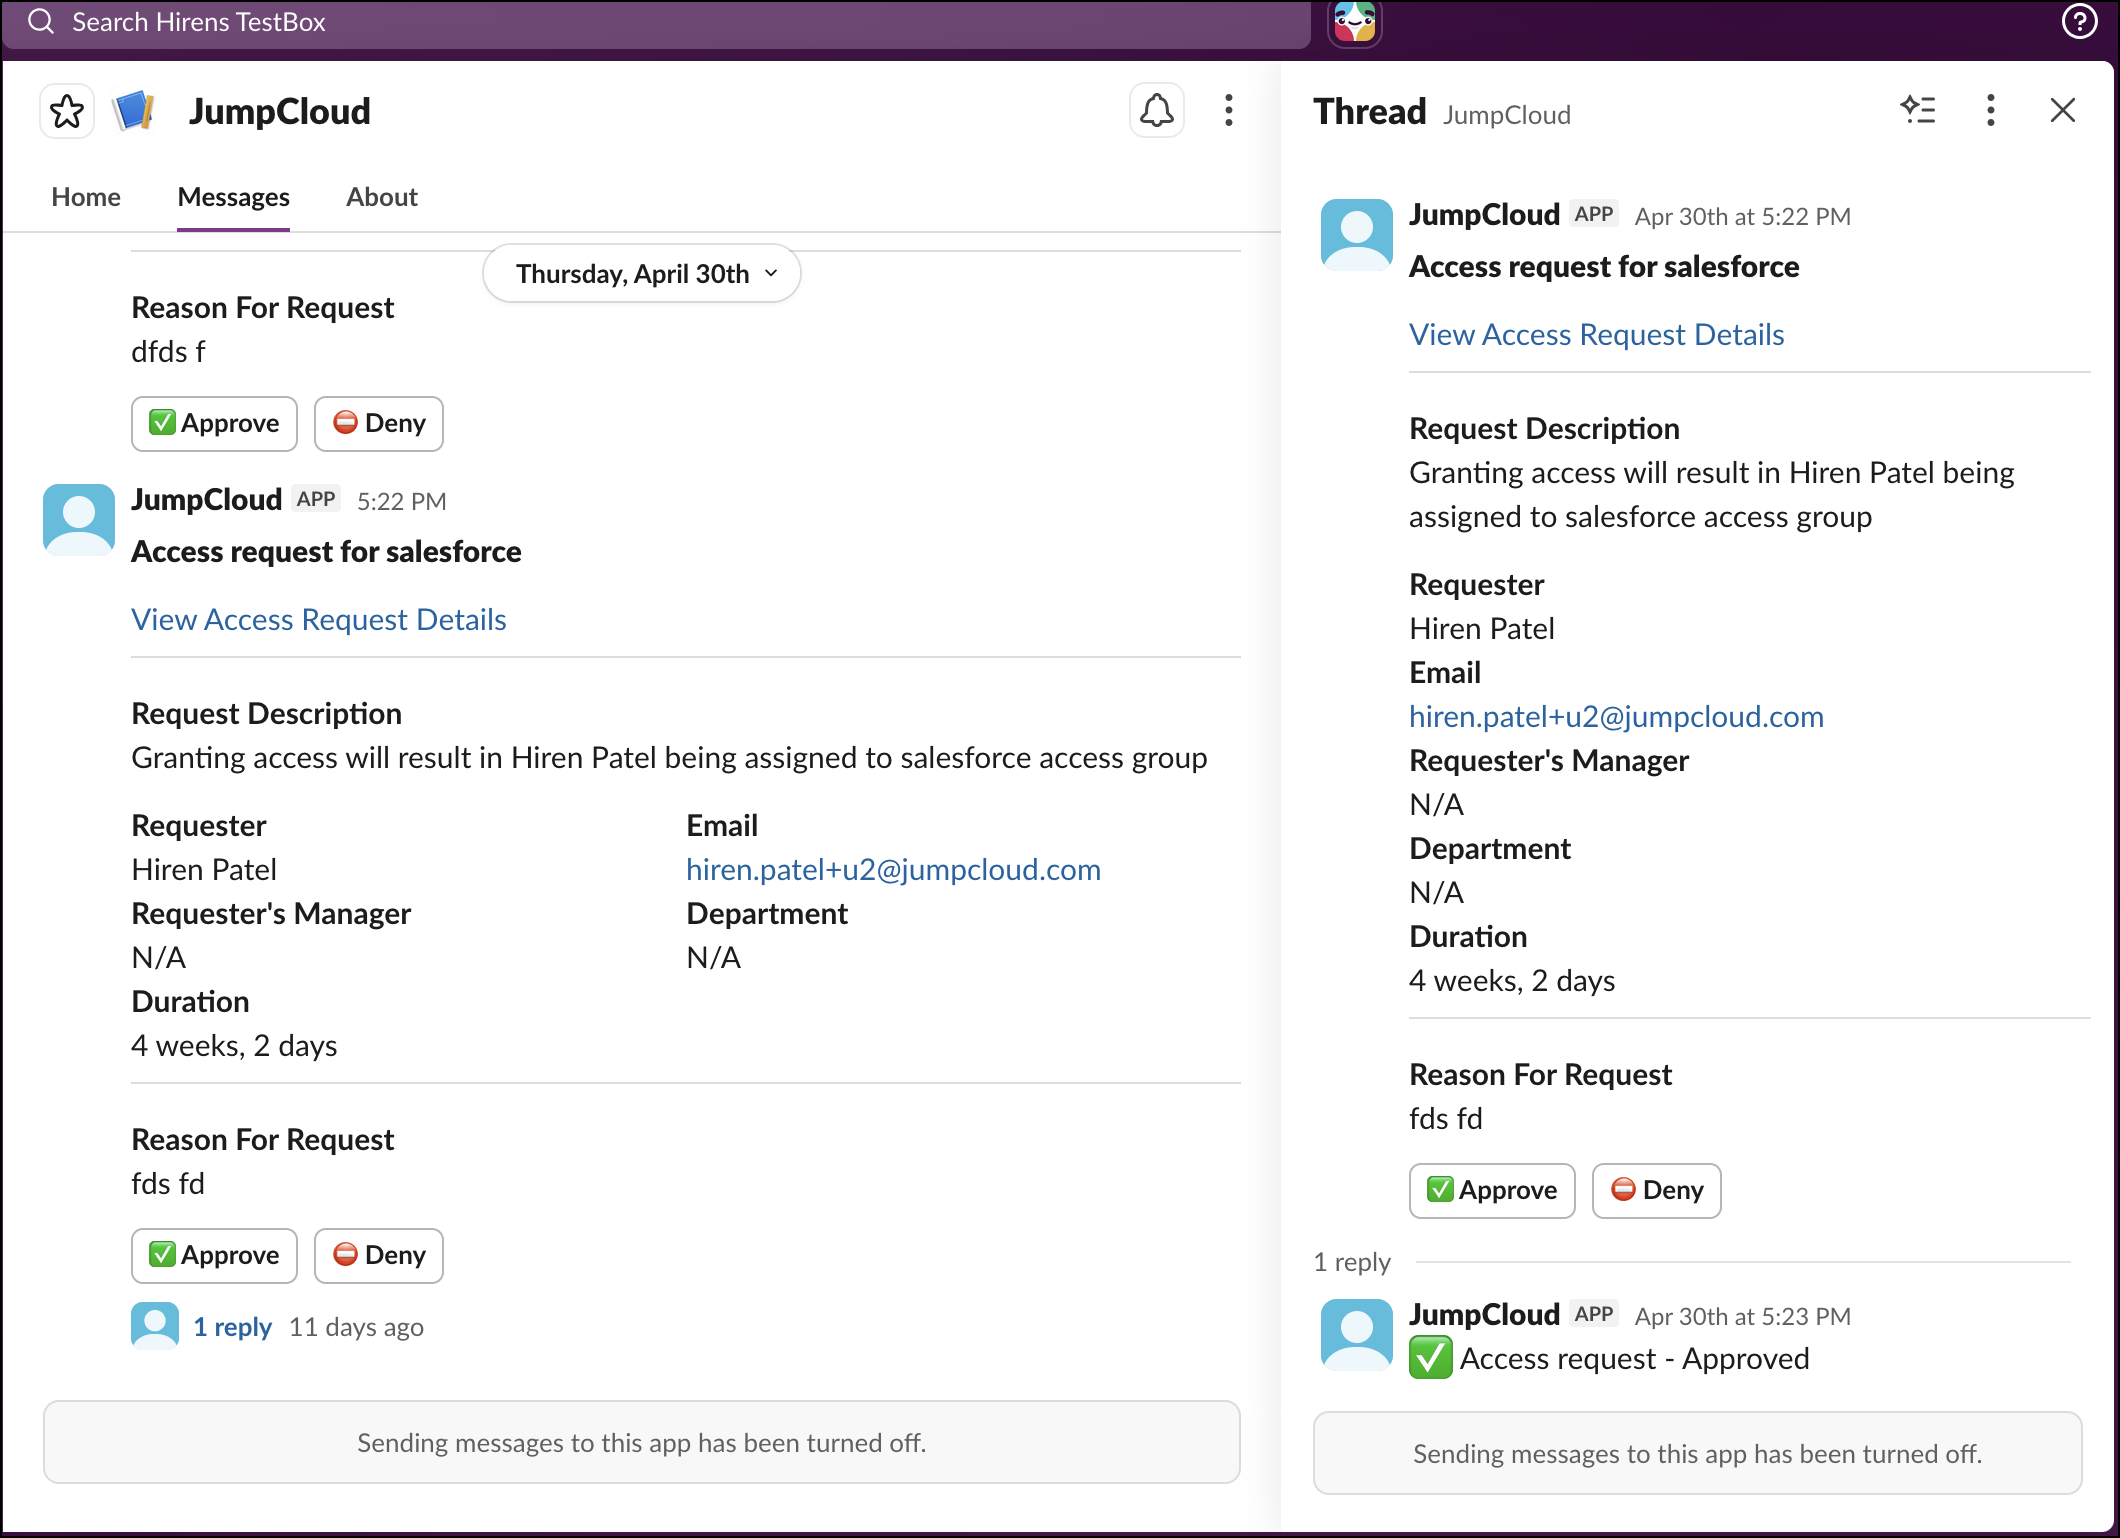
- Click View Access Request Details to view the details in the Access Requests page. This takes you directly to the Access Requests page in JumpCloud for a deeper dive.
- You can either:
- Click the Approve button to approve the request, and then click Grant Access. Optionally, you can also add notes in the Reason section.
- If you wish to deny the request, click the Deny button and provide a reason for denial. Then click Deny Access.
The request will be approved/ denied and status will be updated in the Access Requests page.
Connect JumpCloud to Slack
Users need to connect their JumpCloud user profile with Slack to be able to manage approvals directly from Slack.
- Login to the JumpCloud User Portal.
- Go to Integrations.
- On the slack card, click Connect.
- In the next screen, select your Slack workspace from the dropdown.
- Click Accept & Continue.
Your Slack workspace is now connected to JumpCloud. Whenever a user submits an access request, if you have been assigned as an approver by your admin, you will receive a notification via direct message.
![]()
If you don't the Integrations tab, it means Slack has not been set up yet. The Integration tab will be available only after an admin configures your Slack workspace.
FAQs
The Requests section is only available when the admin enables Approval Flows for you. Get in touch with your admin to have some approval flows enabled for you.
No, currently you can’t cancel a request that has been submitted.