
JumpCloud’s automated patch management now supports Apple’s Declarative Device Management (DDM) framework, enabling control of software updates on iOS devices. These policies allow you to manage and enforce updates on iPhones and iPads to ensure security and compliance. DDM replaces legacy MDM protocols with a proactive model where the device applies updates asynchronously. This results in a more reliable and performant update process.
Features:
- Major Upgrades - Control the rollout of significant OS versions and defer upgrades for up to 90 days after release. This allows you to test new operating systems on a pilot group before a company-wide rollout.
- These are Apple’s major named operating systems that use a whole number integer for their versioning, for example iOS 18.
- Minor Updates - Control the rollout of routine security patches.
- These updates are minor revisions of the existing OS version on the device. The version numbers include a decimal point, for example iOS 18.1.
- Enforcement Deadlines - Set and enforce deadlines for updates. As deadlines approach, devices manage compliance through escalating, non-dismissible reminders to users.
- User Experience - Customize the update experience by configuring how and when users receive notifications.
Prerequisites:
- This policy is supported on iOS devices running iOS 17 and later.
- Apple Mobile Device Management (MDM) must be configured for your organization and devices must be enrolled in JumpCloud MDM. See Set up Apple MDM.
- iOS devices must be supervised. See Understand Supervised Devices and Policies.
- You must have Manager role permissions or higher to create and enforce a patch management policy. See Admin Portal Roles to learn more.
Considerations:
- Updates are enforced using Apple’s SoftwareUpdateEnforcementSpecific DDM configuration, and settings are enforced using the SoftwareUpdateSettings DDM configuration. See Apple’s developer documentation for SoftwareUpdateEnforcementSpecific and SoftwareUpdateSettings to learn more.
- This policy automatically sends the latest OS version based on your configured settings. If you want to manually enforce a specific target version, use the Software Update Enforcement policy instead.
Creating Default Patch Policies and Policy Groups
If your organization has not yet configured any macOS, Windows, or Linux patch management policies or policy groups, you can save time by loading a set of default policies and policy groups. These patch policies and groups allow you to enforce security patches on a large number of managed devices efficiently.
A policy group helps you quickly roll out preconfigured policies using deployment rings. Deployment rings are configured with standard defaults. The deployment ring names match these policy group names, and control how and when an update is applied:
- Vanguard - Deploy automated upgrades inside your IT Department.
- Early Adoption - Deploy automated upgrades to early adopters outside of IT.
- General Adoption - Deploy automated upgrades to general users in your company.
- Late Adoption - Deploy automated upgrades to remaining users in your company.


To create default patch policies and policy groups:
![]()
If your data is stored outside of the US, check which login URL you should be using depending on your region. If your organization uses LDAP, RADIUS, or requires firewall allow list configuration, the Fully Qualified Domain Names (FQDNs) will also be region specific. See JumpCloud Data Centers for the URLs, FQDNs, and IP addresses.
- Log in to the JumpCloud Admin Portal.
- Go to Device Management > Policy Management.
- Click the Patch Management tab, then click the OS tab.
- If you haven’t yet configured a patch policy or patch policy group, click Load Default Policies & Policy Groups to create four out-of-the-box default policy groups. Each policy group contains three preconfigured deployment ring policies that are automatically bound to the group.

- Review the preconfigured settings for the iOS default policies:
- Defer Releases - The number of days to defer the availability of future major OS upgrades and minor OS updates. If you set the deferral length to be greater than the number of days since an update was released, this update will not be available. Any minor release older than 90 days will not be affected. The following settings control deferral:
- Defer Major OS Upgrades or Minor OS Updates - Specifies how many days to defer a major OS upgrade or minor OS update after it's released.
- Enforce Automatic Updates - The number of days that users have to install updates after they are available. The Allow Grace Period setting will apply to any updates available on a device at the time of policy application. If updates are not installed at the end of the grace period, JumpCloud forces the update via a DDM command. Valid values are 1-90 days, and the default is 30 days.
- Defer Releases - The number of days to defer the availability of future major OS upgrades and minor OS updates. If you set the deferral length to be greater than the number of days since an update was released, this update will not be available. Any minor release older than 90 days will not be affected. The following settings control deferral:

![]()
When the deferral periods and the deadline that you set in Step 5 expires, the policy forces updates to be automatically downloaded and installed as soon as the user's device comes online. If something unexpected happens and the update could not be installed, JumpCloud will try again based on Apple’s pre-determined criteria.
| Deployment Policy Ring | Deferral Length in Days | Installation Deadline in Days |
|---|---|---|
| iOS Vanguard | 1 day | 3 days |
| iOS Early Adopter | 7 days | 7 days |
| iOS Early Adopter | 15 days | 10 days |
| iOS Late Adopter | 30 days | 10 days |
When selecting a policy, the Deferral Length in Days setting for minor update releases will apply to any future minor updates.
- You can configure additional settings that are not preconfigured in the default policies:
- Notifications - Set how users receive update notifications.
- Recommended Cadence - Choose how the device shows software updates to the user.
- (Optional) Review your default policy groups and policies. The policies are automatically bound to the appropriate group.

For example, the Vanguard Ring Policy Group automatically contains these three preconfigured deployment ring policies:- iOS Vanguard Ring
- Linux (Ubuntu) Vanguard Ring
- MacOS Vanguard Ring
- Windows Vanguard Ring

![]()
If you already created default policies and groups, and later you create additional default policies or policy groups, an error does not appear. Instead, the existing default policies and policy groups will be used.
- (Optional) Select the policy you just created and select the Device Groups tab. Select one or more device groups where you'll apply this policy. For device groups with multiple OS member types, the policy is applied only to the supported OS.
- (Optional) Select Devices. Select one or more devices where you'll apply this policy.
![]()
For this policy to take effect, you must specify a device or a device group in Step 8 or Step 9.
- Click Save.
- After the policy runs, you can view detailed results for a specific device:
- Go to Device Management > Devices.
- Select the Devices tab, then select the device.
- Select Policy Results, then click view to see more details. An Exit Code of 0 indicates that the policy ran successfully.

- To delete a patch policy, select the checkbox next to the policy and click Delete. The policy is removed from the OS Patch Management list.

Creating an Automatic DDM-based iOS Updates Policy
You can also create your own policy without using the default patch policies covered in the previous section.
To create an Automatic iOS Updates policy:
- From the JumpCloud Admin Portal, go to Device Management > Policy Management.
- Click the Patch Management tab, then click the OS tab. Only OS patch policies appear in this tab.
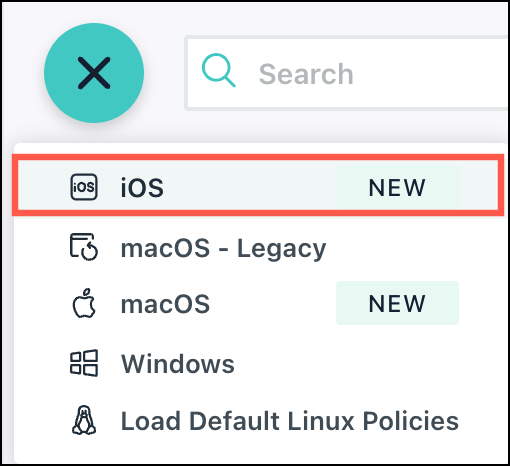
- To create a new, custom Automatic iOS Updates Policy, click (+), then choose iOS.

![]()
- If you don't see the (+) when the OS tab is selected, click Load Default Policies & Policy Groups. Jump to Creating Default Patch Policies and Policy Groups.
- (Optional) On the New Policy panel, enter a new name for the policy or keep the default. Policy names must be unique.
Next, configure General Settings:
- Defer Major OS Upgrades or Minor OS Updates for _ Days - Enter the number of days to delay the availability of major iOS upgrades or minor OS updates on your iOS devices after their official release.
![]()
Deferral periods let you to control when new operating system updates become visible to your users. By deferring updates, you gain time to validate new versions on a pilot group of devices before rolling them out to your entire organization.
- During the Deferral Period - The update is hidden. The device does not prompt the user to update, and the update does not appear in Settings.
- After the Deferral Period - The update becomes visible and user can install it manually. If Enforce Automatic iOS Updates is enabled, the Grace Period countdown begins immediately.
- Select Enforce Automatic iOS Updates to have JumpCloud automatically enforce the latest OS version released by Apple after it become available on devices (depending on your deferral and grace period settings).
![]()
- When enabled, a new enforcement policy is programmatically initiated for every new version.
- The enforcement countdown (Grace Period) begins only after any configured deferral period has ended.
After enabling Enforce Automatic iOS Updates, the following additional settings appear:
- Allow Grace Period of _ Days Before Automatic Installation - Enter the number of days (0-365) users have to install the update manually before it is enforced.
- Local Device Time for Enforcement - Specify the time when the forced installation occurs after the grace period expires. This is requred.
- (Optional) Details URL - Enter a URL (starting with http:// or https://) to display in Settings > General > Software Update. This link directs users to more information about software updates (for example, your company's intranet page, device use policy, or a link to Apple's documentation).
![]()
iOS devices must meet specific network, power, and disk space requirements to begin enforcing updates. See Apple’s Software update requirements to learn more.
- Under Notifications, set how users receive update notifications:
- Select Show All Notifications to show users all software update enforcement notifications up to the deadline.
- Select Notify One Hour Before Deadline to notify users of update enforcement only once before the deadline along with the subsequent restart countdown notification.
![]()
Notifications are delivered to users with increasing frequency as they approach the deadline based on Apple’s schedule. See Apple’s Enforce software updates to learn more.
- Under Recommended Cadence, choose how the device shows software updates to the user:
- Select Show All Versions to show all available updates.
- Select Show Only Oldest Version to show only the lowest numbered update version.
- Select Show Only Newest Version to show only the highest numbered update version.
Next, configure Automatic Actions:
![]()
- Selecting Always Off for any of the following Automatic Actions prevents updates from being downloaded or installed automatically depending on the corresponding setting. This means users must manually download or install updates.
- Certain combinations of these settings can result in policy failure. Jump to Understanding Invalid Automatic Actions Configurations.
- Under Download New Updates When Available, choose how users can control automatic downloads of available updates:
- Select User Controlled to let users choose to enable or disable automatic downloads. Users can choose to download updates in System Settings.
- Select Always On to automatically download updates.
- Select Always Off to disable automatic downloads, requiring user input.
- Under Install iOS Updates, choose how users can control automatic installation of available updates.
- Select User Controlled to let users enable or disable automatic installation.
- Select Always On to automatically install updates.
- Select Always Off to disable automatic installation, requiring user input.
- Under Install Security Response and System Files, choose how users can control automatic installation of regular security updates that come bundled as part of standard OS updates.
- Select User Controlled to let users choose to enable or disable automatic installation of security updates.
- Select Always On to automatically install security updates.
- Select Always Off to disable automatic installation of security updates.
Next, configure the Rapid Security Response (RSR) settings for Apple’s lightweight, out-of-band emergency patches that fix urgent vulnerabilities quickly:
- Under Offer RSRs for User Installation select whether to offer Rapid Security Responses for user installation.
- Under Allow Users to Rollback RSRs select if the system allows users to roll back Rapid Security Responses.
Next, configure Beta Updates:
- Under Program Enrollment, select whether to allow or block OS beta enrollments.
- Select User Allowed to let users manually enroll in any beta programs tied to their Apple ID.
- Select Always On to force devices to enroll in org-defined beta programs.
- Select Always Off to prevent devices from enrolling in any beta programs. Devices are forcefully unenrolled if they are already enrolled in any beta programs.
- Under Offered Program(s), enter the specific beta programs that you want to offer.
- Under Description, enter the readable name of the beta program.
- Under Token, enter the beta seeding service token from Apple Business Manager (ABM) or Apple School Manager (ASM).
- Next, go to the Devices tab to bind the policy to a device, or the Device Groups tab to bind it to a group of devices.
- Click Save.
Verifying Policy Application on iOS Devices
When patch policy declarations are delivered to iOS/iPadOS devices, they will appear in Settings.
To verify that the policy has applied:
- On the iOS/iPadOS device, go to Settings > General > VPN & Device Management.
- Under Mobile Device Management, select MDM Enrollment Profile > Configurations.
- If the policy has applied, Software Update appears with the policy configuration and the required version if an update is available.
Understanding Invalid Automatic Actions Configurations
When configuring Automatic Actions, you have the option to set the following settings to User Controlled, Always On, or Always Off:
- Download New Updates When Available
- Install iOS Updates
- Install Security Response and System Files
![]()
Certain combinations of these settings can cause the policy to be rejected by the OS and generate an "Invalid global settings declaration" error.
Invalid Automatic Actions Configurations
The following table outlines configurations that result in policy failure:
| Policy Setting: Download New Updates When Available | Policy Setting: Install macOS Updates | Reason for Rejection |
|---|---|---|
| User Controlled | Always On | Installation is forced, but downloading is not guaranteed. |
| Always Off | User Controlled | Users can install updates that the Mac is not permitted to download. |
| Always Off | Always On | Installation cannot be forced when downloading is disabled. |